Let’s be honest — dry, rubbery chicken breast has ruined more dinners than we’d like to admit. You follow the recipe, you watch the clock, and somehow it still comes out like you’re chewing through cardboard. The good news? Juicy, tender chicken breast is absolutely achievable, and once you know a few simple secrets, you’ll never look back.
Why Chicken Breast Gets Dry in the First Place
Chicken breast is a lean cut — meaning it has very little fat to protect it from heat. Unlike thighs, which have built-in moisture insurance, breast meat punishes overcooking almost instantly. The moment the internal temperature creeps past 165°F (74°C), the muscle fibers tighten and squeeze out every last drop of moisture.
The fix isn’t complicated. It’s about controlling heat, adding moisture, and respecting the resting time. That’s it.
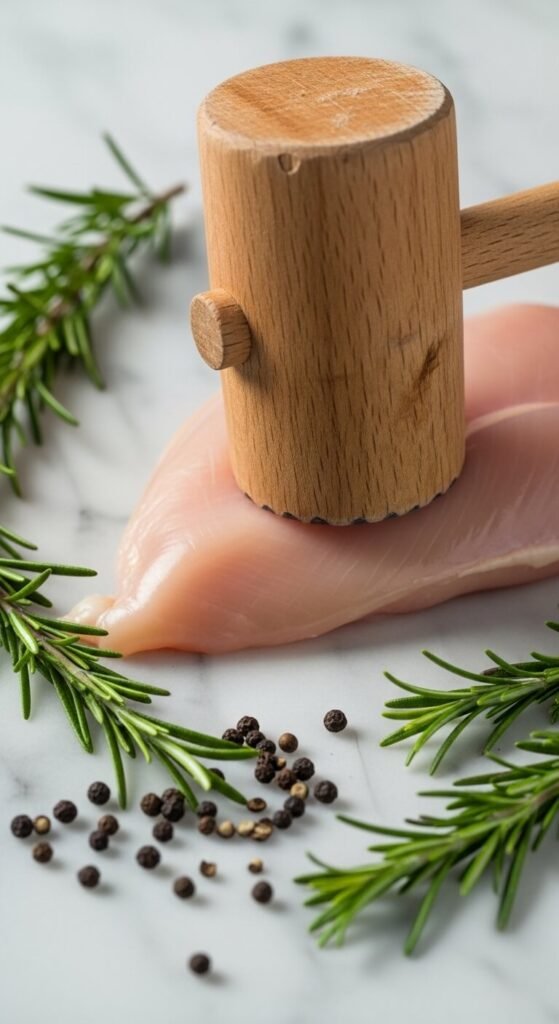
Step 1: Pound It Flat (Yes, Really)
Chicken breasts are notoriously uneven — thick on one end, thin on the other. That means by the time the thick part is cooked through, the thin end is completely overdone.
- Place the breast between two sheets of plastic wrap or inside a zip-lock bag.
- Use a meat mallet or rolling pin to pound it to an even ¾-inch thickness.
- This single step alone will dramatically improve your results.
Step 2: Brine It (Even for 30 Minutes)
A quick brine is the closest thing to a magic trick in the kitchen. Salt water seasons the meat all the way through and helps it retain moisture during cooking.
Simple Brine Recipe:
- 2 cups of cold water
- 1 tablespoon of kosher salt
- Optional: a pinch of sugar, garlic cloves, or fresh herbs
Submerge your chicken and let it sit for 30 minutes to 2 hours in the fridge. Pat it completely dry before cooking — this is crucial for getting a good sear.
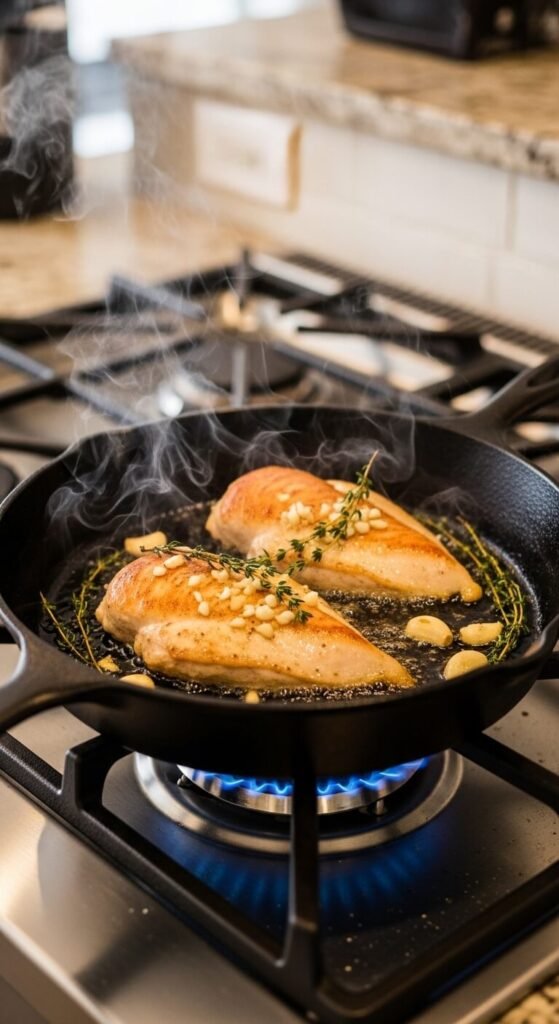
Step 3: Sear First, Finish in the Oven
This is the method used by most professional kitchens, and for good reason. A screaming-hot pan creates a beautiful golden crust that locks in flavor, while a gentle oven finish cooks the inside evenly without blasting it with direct heat.
Here’s how:
- Heat an oven-safe skillet (cast iron is ideal) over medium-high heat with a drizzle of olive oil.
- Season your dried, brined chicken generously with salt, pepper, garlic powder, and smoked paprika.
- Sear for 3–4 minutes per side until golden brown — don’t move it around.
- Transfer the pan to a 400°F (200°C) oven for 8–10 minutes.
- Pull it out when an instant-read thermometer reads 160°F (71°C) — carryover heat will bring it to 165°F.
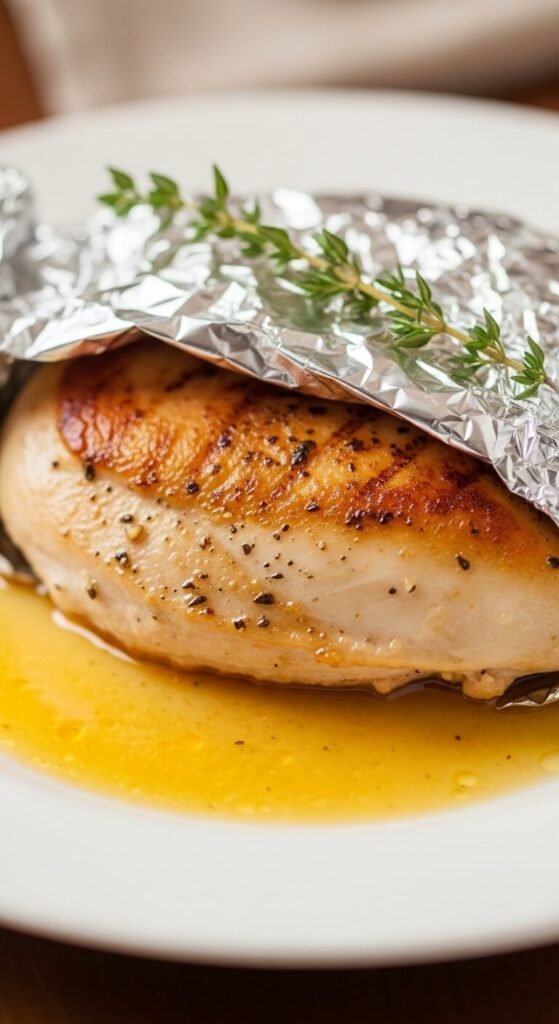
Step 4: Let It Rest — No Exceptions
This is the step most people skip, and it’s costing them everything. When you cut into chicken straight off the heat, all those precious juices run straight onto your cutting board.
- Rest your chicken for a minimum of 5 minutes, loosely tented with foil.
- The juices will redistribute back through the meat.
- When you finally slice it, it stays moist all the way through.
Bonus Tips for Extra-Juicy Chicken Every Time
- Don’t use cold chicken straight from the fridge. Let it sit at room temperature for 15 minutes before cooking.
- Use a thermometer. Guessing is the enemy of juicy chicken. A $10 instant-read thermometer is worth every penny.
- Add a butter baste. In the last 2 minutes of oven time, add a knob of butter, a smashed garlic clove, and a sprig of rosemary to the pan and spoon it over the chicken repeatedly.
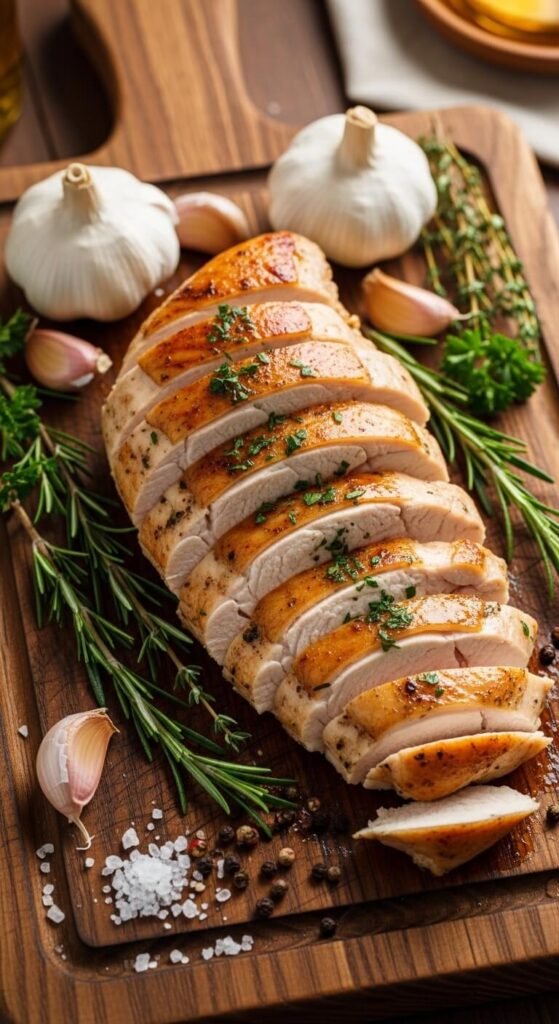
- Slice against the grain. It makes every bite more tender, no matter what.
The Juicy Payoff
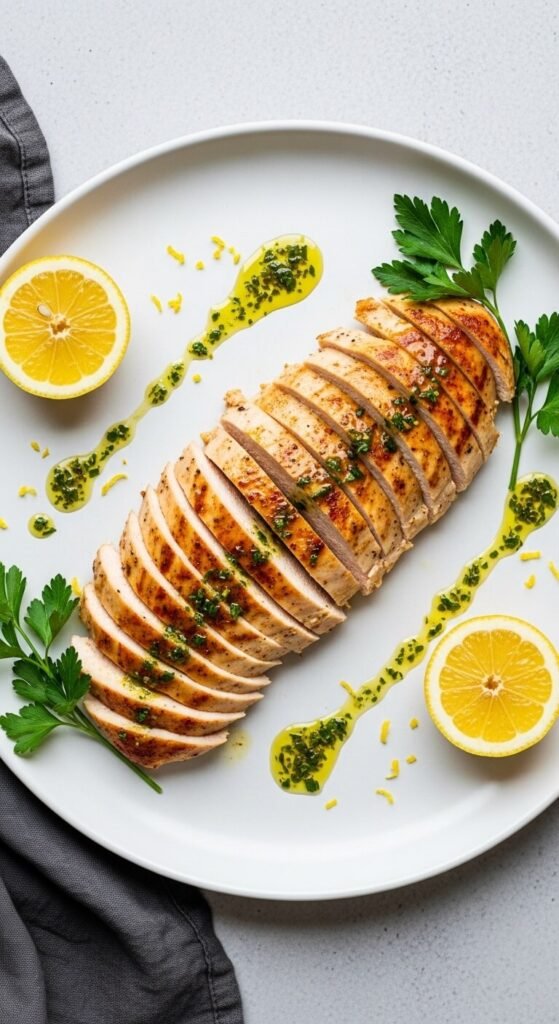
Once you try this method, dry chicken breast becomes a thing of the past. It takes a little more intention than just throwing it in the pan, but the results are so worth it — tender, flavorful, and juicy every single time.
Save this article for your next meal prep session, and share it with anyone who’s ever pushed a sad, dry piece of chicken around their plate. They’ll thank you for it. 🍗