Crispy chicken wings without a vat of bubbling oil? It’s not just possible — it’s actually easier, less messy, and honestly just as crispy as the deep-fried version. The secret isn’t a fancy gadget or a secret ingredient. It’s all about technique.

If you’ve been avoiding homemade wings because deep frying feels intimidating (or just too messy), this method is about to become your new go-to. Let’s get into exactly how to make wings that crunch on the outside and stay juicy on the inside — no fryer required.
Why Wings Usually Turn Out Soggy (And How to Fix It)
Before jumping into the method, it helps to know what typically goes wrong:
- Too much moisture on the skin. Wet wings steam instead of crisping.
- Overcrowding the pan. This traps steam and softens the skin.
- Skipping the baking powder trick. This is the real secret to crispy oven wings.
- Sauce added too early. Sauce traps moisture and ruins the crunch if added before cooking.
Once you avoid these common mistakes, crispy wings become almost foolproof.
What You’ll Need
- 2 lbs chicken wings (separated into drumettes and flats)
- 1 tbsp baking powder (not baking soda!)
- 1 tsp salt
- 1 tsp garlic powder
- ½ tsp black pepper
- ½ tsp smoked paprika
- Olive oil spray
- Your favorite wing sauce, for serving

Step 1: Dry the Wings Thoroughly
This step is non-negotiable if you want crispy skin.
- Pat each wing dry with paper towels, removing as much surface moisture as possible.
- For extra crispiness, let the wings sit uncovered in the fridge for 30 minutes to an hour before cooking. This helps draw out additional moisture.
Tip: The drier the skin going into the oven, the crispier it will come out. Don’t rush this step.
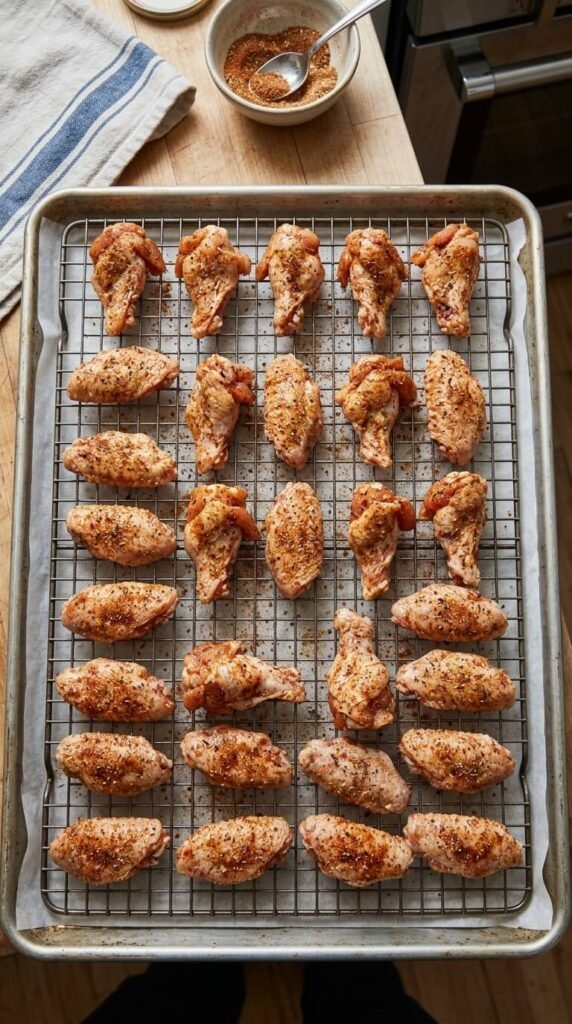
Step 2: Coat with the Baking Powder Mixture
Here’s the trick that makes oven wings rival deep-fried ones.
- In a bowl, mix the baking powder, salt, garlic powder, pepper, and smoked paprika.
- Toss the dry wings in the mixture until evenly coated.
- Make sure every wing has a light, even dusting — this is what creates that bubbly, crispy skin in the oven.
Why baking powder? It raises the pH of the chicken skin, helping it break down proteins and crisp up far more than it would on its own. (Just make sure it’s baking powder, not baking soda — baking soda will taste soapy and bitter.)

Step 3: Bake on a Wire Rack
The wire rack is just as important as the baking powder trick.
- Preheat your oven to 425°F.
- Place a wire rack on top of a baking sheet lined with foil (for easy cleanup).
- Arrange the wings in a single layer on the rack, leaving space between each piece.
- Lightly spray with olive oil for extra crispiness.
Tip: Don’t skip the wire rack. Without it, the wings sit in their own rendered fat and turn soggy on the bottom.
Step 4: Bake Low, Then Crank Up the Heat
This two-stage baking method is the final key to crispy perfection.
- Bake at 425°F for 30 minutes to render the fat and start crisping.
- Increase the oven temperature to 450°F and bake for another 15–20 minutes, until deeply golden and crispy.
- Flip the wings halfway through for even crisping on both sides.
Tip: The wings are done when the skin looks dry, tight, and slightly blistered — not pale or greasy looking.
Step 5: Sauce at the Very End
This is the step most people get wrong.
- Let the wings rest for 2–3 minutes after baking.
- Toss them in your favorite sauce right before serving — buffalo, honey garlic, BBQ, or a dry rub if you prefer them sauce-free.
- If you add sauce too early or let them sit in it too long, the crispy skin will soften fast.

What to Serve with Crispy Wings
Round out your wing night with classic sides:
- Celery and carrot sticks
- Ranch or blue cheese dressing for dipping
- Crispy fries or oven-baked potato wedges
- A cold, crunchy coleslaw
Storage and Reheating Tips
- Fridge: Store leftover wings in an airtight container for up to 3 days.
- Reheat: Use the oven or air fryer at 400°F for 8–10 minutes to bring back the crisp. Avoid the microwave — it makes the skin rubbery.
- Freezer: Freeze cooked, unsauced wings for up to 2 months; reheat straight from frozen, adding extra time as needed.
The Bottom Line
You don’t need a deep fryer or a pot of hot oil to get genuinely crispy chicken wings. With a little baking powder, a wire rack, and the right oven technique, you’ll get wings that crunch just like your favorite restaurant version — minus the mess and the splatter burns.
Save this recipe for later so you always have a go-to method for crispy, oven-baked wings any night of the week!