Picture this: it’s 5:45 p.m., dinner needs to happen, and the last thing you want to do is wash, chop, and cook five different vegetables from scratch. Now imagine opening your fridge to find perfectly prepped sides just waiting to be reheated or tossed together in minutes. That’s the power of side prep — and it might be the single most underrated meal prep trick out there.
If main dishes get all the meal-prep glory, it’s time sides got their moment. Let’s break down exactly how to prep them so future-you can breathe easy on busy weeknights.
Why Prepping Sides Is a Total Game-Changer
Mains usually take center stage in meal planning, but sides are often what slows dinner down the most. Here’s why prepping them ahead makes such a difference:
- They’re often the most time-consuming part. Chopping, washing, and peeling takes real time.
- They reheat better than you’d think. Most prepped sides hold up beautifully for days.
- They make mixing and matching easy. Once prepped, you can pair them with whatever main you’re making that night.
- They reduce food waste. Prepping in batches means less produce going bad in the crisper drawer.
Step 1: Choose Sides That Prep and Store Well
Not every side is ideal for prepping ahead. Focus on ones that hold their texture and flavor well over a few days.
Great options for prepping ahead:
- Roasted vegetables (broccoli, carrots, Brussels sprouts, sweet potatoes)
- Grain-based sides (rice, quinoa, couscous)
- Mashed potatoes
- Coleslaw or sturdy salads (kale, cabbage-based)
- Beans and legumes
Sides best made fresh:
- Delicate green salads (lettuce wilts fast)
- Anything breaded and meant to be crispy
- Sauces with dairy that may separate over time
Tip: If a side reheats well as leftovers, it’s a strong candidate for prepping ahead.
Step 2: Wash, Chop, and Portion in Bulk
Set aside one block of time — usually a Sunday — to prep multiple sides at once.
- Wash and chop vegetables for the week in one sitting.
- Cook grains in bulk; rice and quinoa both reheat beautifully.
- Portion ingredients into containers based on how you’ll use them (some pre-cooked, some just chopped and ready to roast).
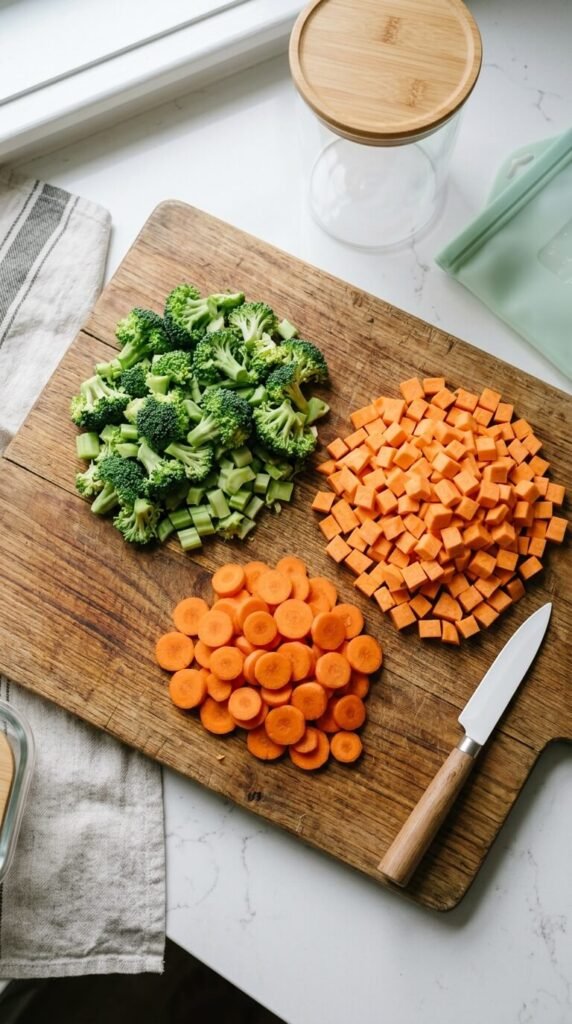
Tip: Group prep by cooking method. Chop all your roasting vegetables together, then move on to anything going into a pot or skillet.
Step 3: Pre-Roast or Par-Cook When Possible
For sides like roasted vegetables, doing a partial cook ahead of time saves major effort later.
- Toss vegetables in oil, salt, and pepper, then roast until just shy of fully done.
- Cool completely before storing — this prevents sogginess in the fridge.
- When ready to serve, finish roasting for 5–10 minutes at a high temperature to re-crisp the edges.
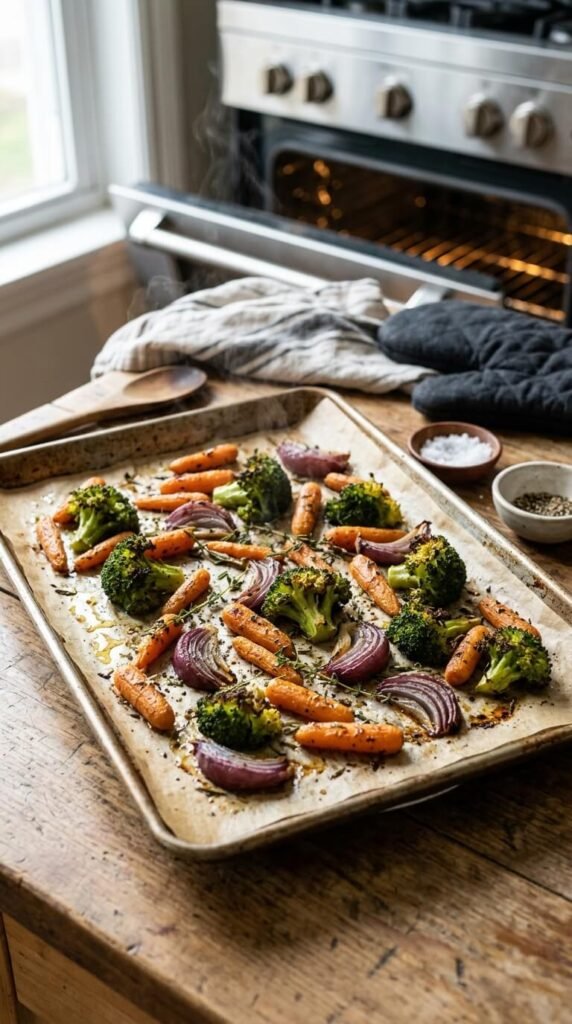
Tip: Slightly undercooking vegetables during prep means they won’t turn mushy when reheated later.
Step 4: Store Everything the Right Way
Proper storage is what makes prepped sides actually convenient instead of a science experiment in your fridge.
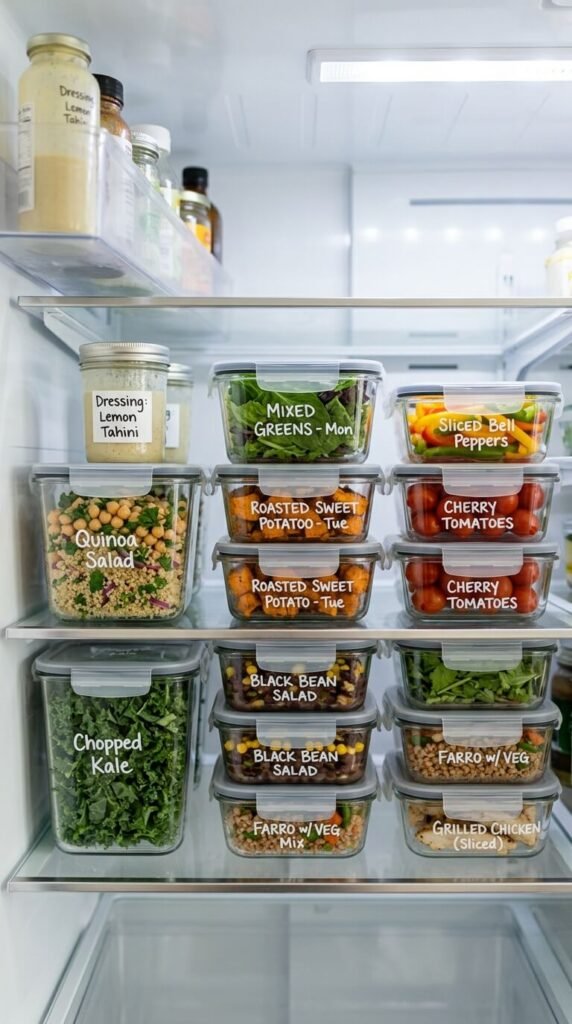
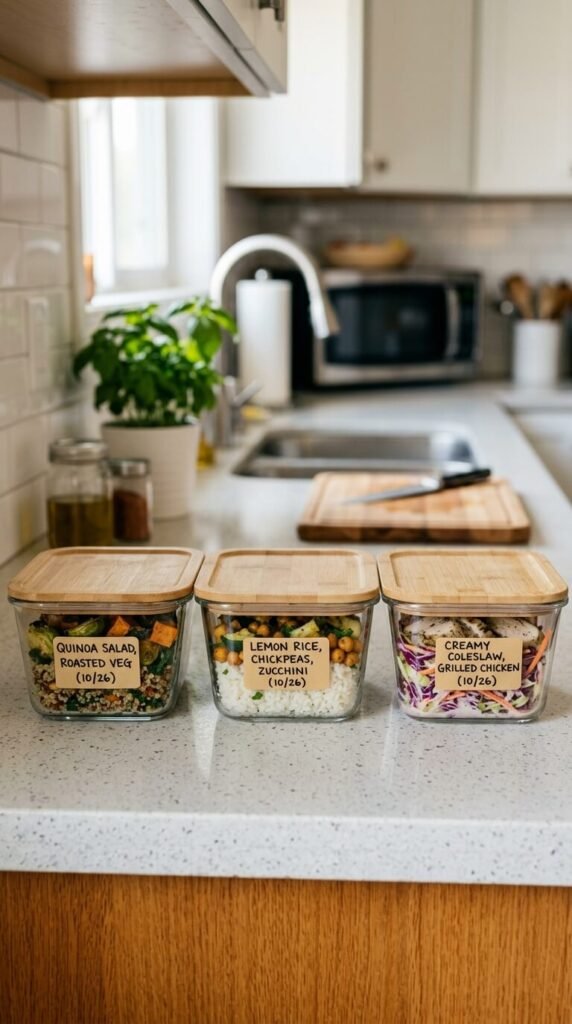
- Use clear, airtight containers so you can see what you have at a glance.
- Label containers with the prep date to track freshness.
- Store sauces and dressings separately from salads to prevent sogginess.
- Keep grains and roasted vegetables in shallow containers so they cool and reheat evenly.
Tip: Shallow, wide containers cool food faster and more evenly than tall, deep ones — this matters for food safety too.
Step 5: Build a Simple “Mix and Match” System
Once your sides are prepped, the real magic happens at dinner time.
- Pair a prepped grain with a quick protein for an easy bowl.
- Reheat roasted vegetables alongside whatever main you’re making that night.
- Toss prepped slaw or salad bases with fresh dressing right before serving.
This turns dinner into an assembly process instead of a full cooking session.
Step 6: Keep a Rotating Side Prep List
To avoid prep burnout, build a small rotation of go-to sides you prep most weeks:
- 1 roasted vegetable
- 1 cooked grain
- 1 sturdy salad or slaw
- 1 starchy side (potatoes, sweet potatoes, or beans)
Rotate flavors and seasonings weekly so things don’t feel repetitive, even if the format stays the same.
Bonus Tips for Stress-Free Side Prep
- Prep in bulk, but store in meal-sized portions. This avoids overeating or wasting extras.
- Use sheet pans for efficiency. Roast multiple vegetables on the same pan, separated by section.
- Don’t over-season ahead. Add finishing touches like fresh herbs or citrus right before serving for the best flavor.
- Set a consistent prep day. Even 45–60 minutes once a week makes a noticeable difference.
The Bottom Line
Prepping sides ahead of time might be the most underrated way to make weeknight dinners faster and less stressful. With a little planning, some smart storage, and a simple mix-and-match system, you’ll always have a side ready to go — no last-minute chopping required.
Save this recipe for later so you always have a go-to system for stress-free, time-saving dinner prep!